Having a few tricks up your sleeve as a content creator to make your editing process go more quickly and smoothly is priceless. If you want to learn Lizzie Peirce’s top ten audio and video editing hacks, give this blog article a look. With Adobe Stock and Epidemic Sound in tow.
There’s a good chance you’re a video editor or creator. And if you are, there’s a decent probability of spending a lot of time in Premiere Pro. The shortcuts I’ll discuss will genuinely help you work faster and easier. Let’s get started!
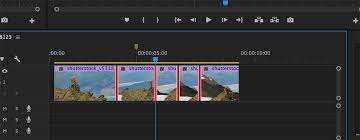
In Premiere Pro, add keyframes for the audio.
When cutting between speaking and B-roll in a video, use this trick. First and foremost, pick a tune or sound effect from Epidemic Sound that you enjoy and drop it into your timeline. Add key frames by using the pen tool or pressing P on your keyboard to create points on your soundtrack.
I usually decrease it during my talking sequences and increase it for B-roll.
Always be sure your audio isn’t peaking, but you also want to ensure it’s not too low. To do so, check your audiometer to the right. And use keyframes to keep your audio consistent even when shouting or murmuring – it should always be level.
Premiere Pro video effects
Editors may have their effect library, which they frequently employ. These effects are often a reflection of the editor’s style. So, if you want to save time and effort: create a “Favorites” folder in Premiere Pro to keep track of all those effects. This will spare you considerable time searching and categorizing things.
Playback resolution Premiere Pro
Not all has the chance to work on a computer that can play back 4k video without stuttering. If your computer is lagging, try lowering the playback resolution.
You must go to the right-click menu and change the playback resolution to half or quarter. This doesn’t improve the video’s quality; it lets the software playback excerpts without using full resolution.
Use proxies in Premiere Pro
Proxies are an excellent option if you want to go another route for faster playback when dealing with high-resolution footage. What exactly is a proxy? You might be wondering. It does seem complicated. Here’s how it works in practice.
Navigate to the project’s X folder and double-click the clip you want to convert. Select a file format and a location for the proxies by right-clicking them from the project X folder, then clicking “Proxy,” “Create Proxy,” and finally “Choose File Format.” Adobe Media Encoder will be started automatically after that.
Now you must add a button to enable and disable the proxies. So, beneath the video preview, you’ll see a program monitor tool button.
Select the button editor, drag the toggle proxies option from the toolbar onto the window, and then quit the editor. You’ll notice that the proxy button changes color when you press it and that you may use your original media again by repressing it.
Use shortcuts
Shortcuts are also known as life saviors. I prefer to arrange my keyboard so that my most-used buttons are where my hands rest. To modify them, click Premiere Pro, then Keyboard Shortcuts; change them to suit your preferences. M for “Marker,” C for “Razor,” and S is one of my favorites, so I’ve changed it to S.
Record audio directly to timeline
Did you know you can use an external microphone to record voiceovers and audio directly to your timeline? You heard that correctly: you can now record audio straight into your timeline.
That means you’ll be able to ensure that the audio fits with the footage you’d want to use over it. This will also save you time in terms of uploading and importing. I’m a sucker for a good voiceover, so this hack is right up my alley.
Audio transitions Premiere Pro
Audio is just as essential as visuals in producing a positive viewing experience. Audio fades are crucial to maintaining a video’s flow. That’s why it’s critical to use audio transitions, which can be quickly done by right-clicking on the end of a clip and choosing “Apply Default Transitions.”
Adjustment layers Premiere Pro
Adjustment layers are essentially a safety net for your work. They’re handy for applying effects and color grading too many clips at once and are even more helpful when removing them.
To add an adjustment layer, ensure you have selected the project window, then go to the menu and select ‘Add Adjustment Layer.’ It will appear in your project window after you drag it over the timeline, as though it’s a video clip on its own.
Use markers
You make these in one click on a keyboard, saving a lot of time cleaning. I like to use markers to indicate where I believe each cut should be in my Epidemic Soundtrack: I listen to the beat of my song and put a marker in for all beats where I think it should be removed. This makes the footage appear connected. Once again, I prefer to simply utilize M as a shortcut to add a mark.
Export in media encoder
The tenth step is to modify your footage while exporting using Adobe Media Encoder. Waiting for a project to finish is not enjoyable so that you may work on your next one.
However, you don’t have to export straight from Premiere Pro – instead, you may use Media Encoder to output your films so that you can access free Premiere Pro software to edit your next film. Isn’t it fantastic?
Conclusion:
There you have many tips to make your work in Premiere Pro more efficient, faster, and easier. I hope these points help you as much as they’ve helped me.


